Introduction to Red Velvet Cake
What is red velvet cake and why is it special?
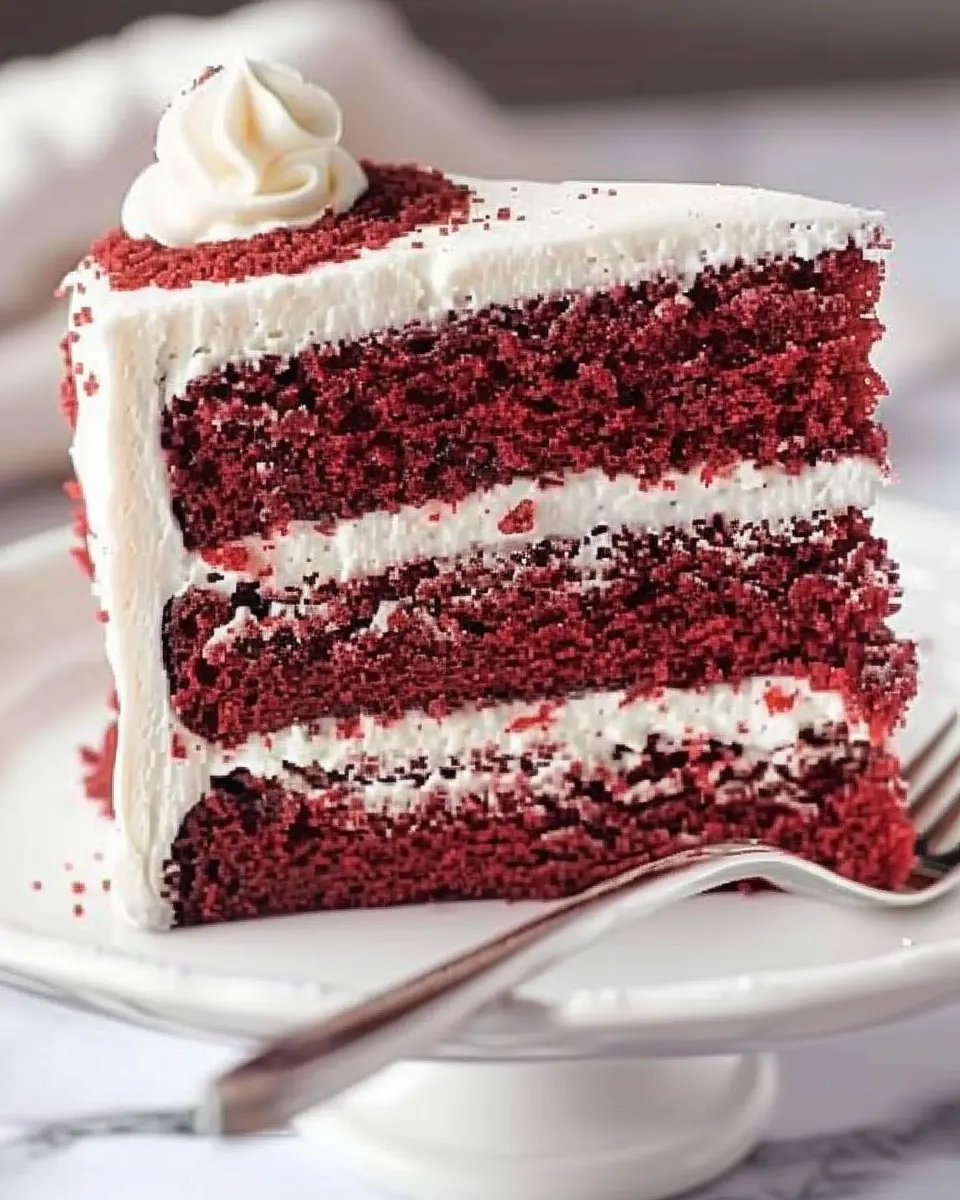
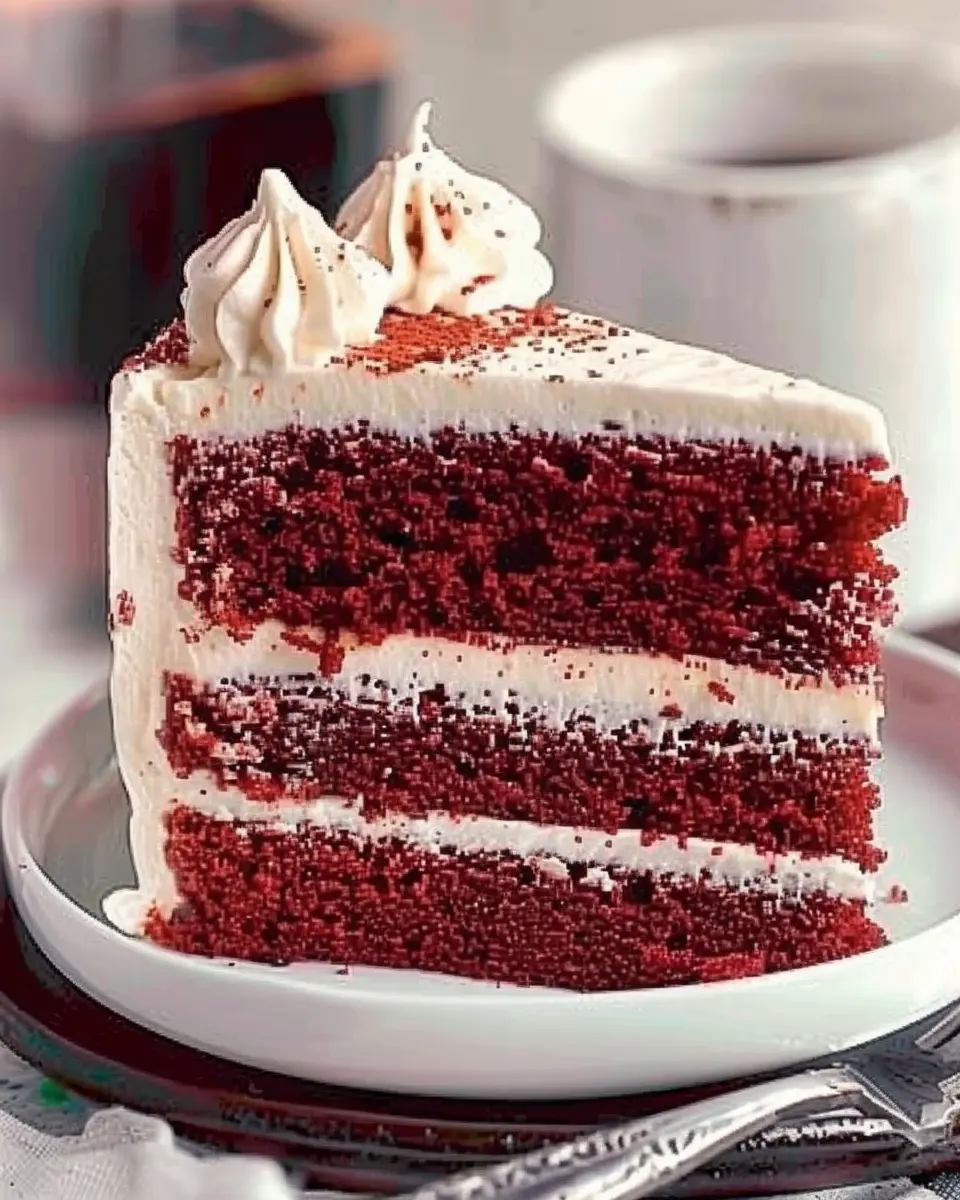
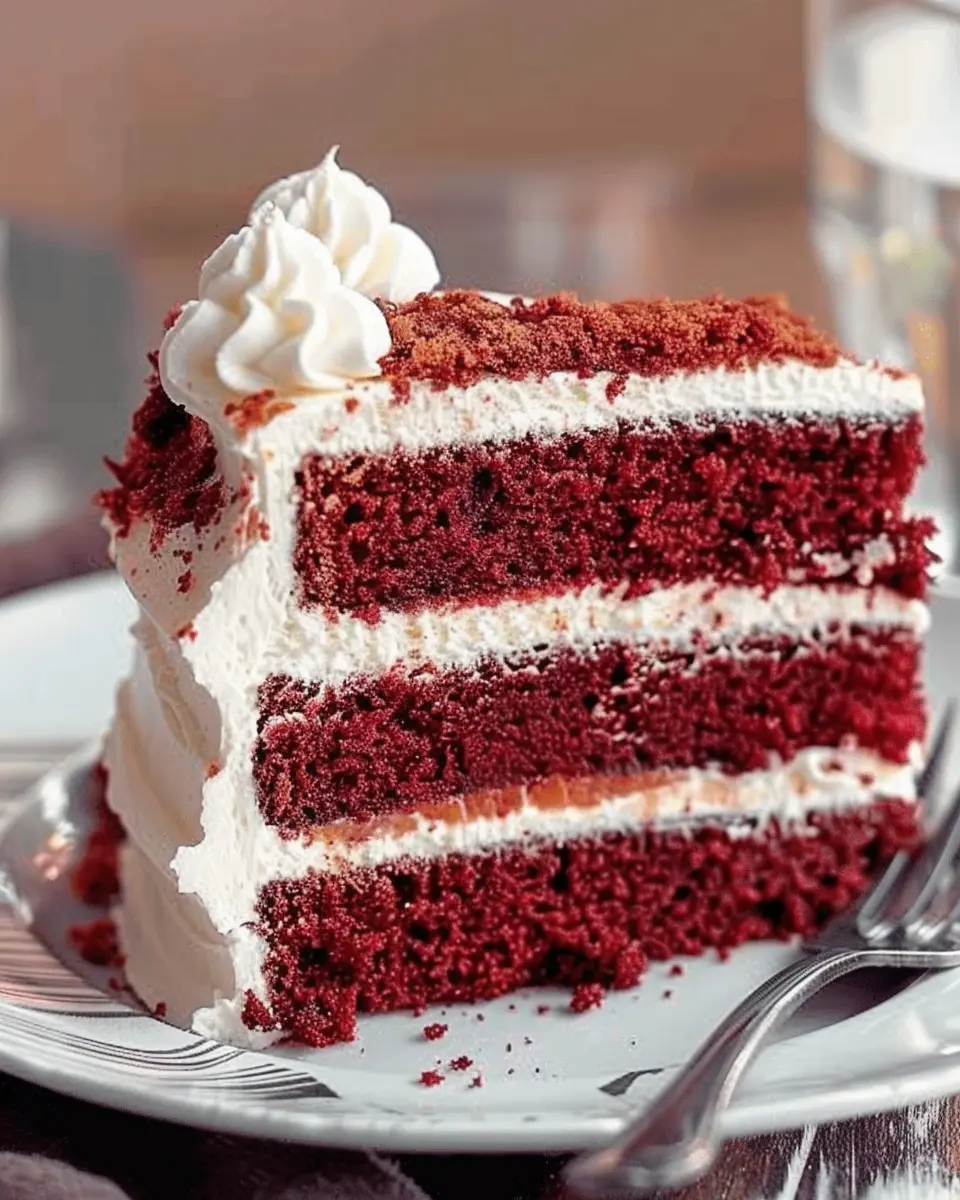
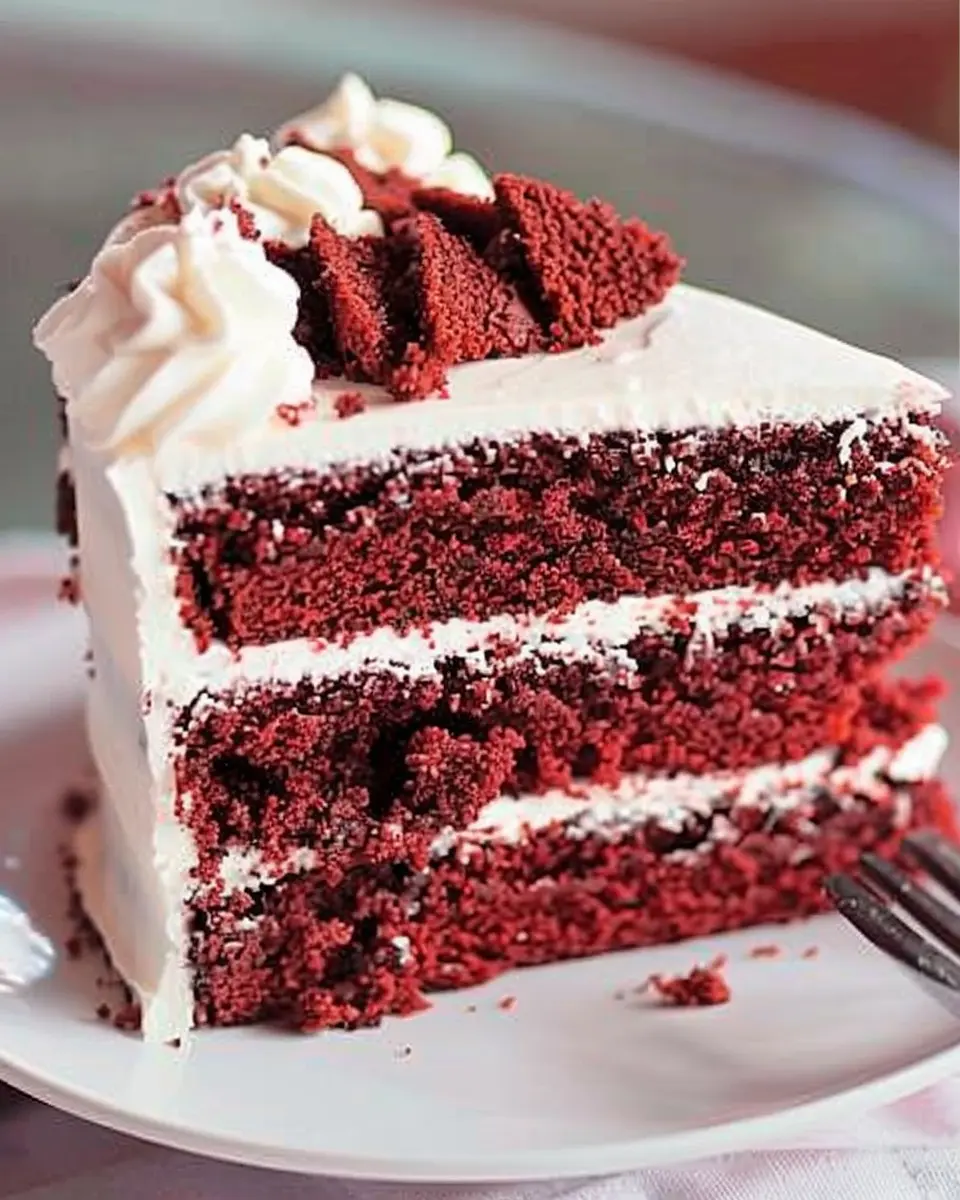
Red velvet cake is more than just a dessert; it’s a delightful blend of flavors and textures wrapped in a visual treat. Typically characterized by its rich, red hue, this cake combines the lightness of a classic sponge with subtle chocolate notes and a characteristic tang from buttermilk. The unique combination of ingredients creates a moist, tender crumb that just begs to be savored. Topped with a luscious cream cheese frosting, the contrasting flavor melds beautifully with the cake’s gentle sweetness.
But what makes red velvet cake truly special is its history. Originating in the Southern United States, this dessert has a fascinating backstory that dates back to the 1800s. Some say it was originally created as a luxury cake using cocoa and buttermilk to achieve a silkier texture, while others attribute its vibrant color to the use of beets. Regardless of its origins, red velvet cake has woven itself into the fabric of American baking culture, making it a beloved treat for birthdays, weddings, and special occasions alike. For those wanting to explore the science and art involved in baking, I recommend checking Serious Eats for some incredibly informative resources.
My first encounter with red velvet cake
I still vividly remember the first time I tasted red velvet cake. It was during a friend’s birthday party a few years ago. The moment I saw the deep crimson layers festooned with creamy frosting, I was entranced. I had always been a chocolate cake enthusiast, but there was something enchanting about this particular cake. As I took my first bite, I was amazed by the divine combination of flavors and how the tanginess of the cream cheese frosting balanced the subtle sweetness of the cake. It was a revelation—I’d found a new favorite!
As I savored each bite, I learned that red velvet cake isn’t just about the taste; it carries a sense of celebration and connection. Sharing food, especially something as iconic as red velvet cake, creates warm memories and bonds that last a lifetime. If you’re curious about recreating this culinary masterpiece in your own kitchen, keep reading for the full recipe!
Ingredients for Red Velvet Cake
Essential ingredients and their roles in the recipe
When diving into the delicious world of red velvet cake, understanding the essential ingredients is key. Here’s a breakdown:
- All-purpose flour: Provides structure to our cake. For a softer texture, you might want to try cake flour.
- Granulated sugar: Sweetens the cake and contributes to its moisture.
- Cocoa powder: Just a hint gives that classic red velvet flavor without making it taste like chocolate.
- Baking soda and vinegar: This duo helps the cake rise and gives it that signature fluffy texture.
- Buttermilk: Adds a lovely tang and moisture. You can make a quick version using milk and vinegar.
- Vegetable oil: Keeps the cake moist and tender—no one wants a dry slice!
- Eggs: Bind everything together and enhance the cake’s richness.
- Red food coloring: The star of the show! It gives that stunning red hue.
You can find more ingredient details on King Arthur Baking.
Substitutions for dietary restrictions
Don’t let dietary restrictions hold you back! Here are some options to consider:
- Gluten-free cake flour: For the gluten-free crowd, substitute with a 1:1 gluten-free blend.
- Plant-based alternatives: Use non-dairy milk and a flaxseed mixture instead of eggs for vegan baking.
- Sugar alternatives: Swap granulated sugar with coconut sugar or a granulated sweetener of your choice.
With these substitutions, everyone can enjoy a slice of red velvet cake, no matter their dietary needs! How do you customize your baking recipes?
Step-by-Step Preparation of Red Velvet Cake
When it comes to red velvet cake, there’s a unique allure that draws everyone in. Its rich flavor and beautiful color make it a staple for celebrations. But don’t worry if you’ve never made it before—I’ve got you covered with this step-by-step guide. Let’s dive right in!
Prepping the Baking Pans and Ingredients
The first step in making a show-stopping red velvet cake is to prepare your tools and ingredients. This means gathering everything you’ll need and ensuring you have a clean workspace. Here’s what you need:
-
Ingredients:
-
2 ½ cups all-purpose flour
-
1 ½ cups granulated sugar
-
1 cup vegetable oil
-
1 cup buttermilk, room temperature
-
2 large eggs, room temperature
-
2 tablespoons red food coloring
-
1 teaspoon vanilla extract
-
1 teaspoon baking soda
-
1 teaspoon white vinegar
-
½ teaspoon salt
-
2 tablespoons cocoa powder (unsweetened)
-
Baking Tools:
-
Two 9-inch round cake pans
-
Mixing bowls
-
Whisk and spatula
-
Parchment paper
-
An oven thermometer (to ensure accurate baking)
Start by preheating your oven to 350°F (176°C). While that warms up, grease your cake pans and line the bottoms with parchment paper—this helps the cake slide out easily once baked.
Making the Batter
Now we’re getting to the fun part! In a large bowl, combine the flour, cocoa powder, and salt. In another bowl, blend the sugar and oil until light and fluffy. Next, add the eggs, buttermilk, red food coloring, and vanilla extract, mixing until it’s all combined.
Don’t rush this step—give it a good whisk! Gradually add the dry ingredients to the wet mixture until everything is just incorporated. Lastly, combine the baking soda and vinegar in a small bowl, letting it fizz before folding it into the batter. This reaction is what gives your cake that soft, velvety texture.
Baking the Cake Layers
Now it’s time to pour that beautiful batter into the prepared pans! Divide the mixture evenly to ensure even baking. Pop those pans into your preheated oven and bake for 25-30 minutes, or until a toothpick inserted into the center comes out clean.
While you wait, why not check out some tips on perfecting your cake-baking skills at ChefSteps?
Cooling and Slicing the Cake
Once your cakes are out of the oven, let them cool in the pans for about 15 minutes. After that, gently transfer them to a wire rack to cool completely. This part is crucial: if you try to frost a warm cake, the frosting will melt and create a gooey disaster!
Once cooled, if your cakes have domed on top, slice them flat to create even layers. This will give you a professional-looking finish.
Ice the Cake with Vanilla Icing
For the icing, a classic cream cheese frosting pairs perfectly with red velvet cake. Here’s a quick recipe:
- 1 cup unsalted butter, softened
- 8 oz cream cheese, softened
- 4 cups powdered sugar
- 1 teaspoon vanilla extract
Beat the butter and cream cheese together until smooth. Gradually add the powdered sugar and vanilla, mixing until fluffy. Spread a generous layer between the cake layers and over the top and sides.
Feel free to get creative with the decoration! Some people love adding crushed nuts or chocolate shavings for an extra touch.
And there you have it—a stunning red velvet cake that’s sure to impress! Enjoy every slice and don’t forget to share with friends (or keep it all for yourself—it’s that good!).
Creative Variations on Red Velvet Cake
If you’re as enamored with red velvet cake as I am, you likely already know that there are countless ways to enjoy this classic treat. Let’s explore some delicious variations that might just elevate your baking game!
Indulgent Red Velvet Cake with Cream Cheese Icing
Nothing complements red velvet cake quite like a rich and creamy cream cheese icing. It’s a match made in dessert heaven! The tangy creaminess cuts through the sweetness of the cake, adding depth and making each bite irresistible. You can also experiment by mixing in a dash of vanilla or orange zest to your frosting for an extra flavor kick.
Delightful Red Velvet Cupcakes
For a more portable version, why not try your hand at making red velvet cupcakes? These individual servings are perfect for parties or a cozy night in. Simply bake the batter in a cupcake pan, and top with the classic cream cheese icing. You can even fill the center with a surprise like chocolate ganache or whipped cream cheese for an extra layer of delight!
Exploring Unique Flavors
Want to put a unique spin on your red velvet cake? Consider infusing flavors like coffee or nuts. A hint of coffee can enhance the richness and chocolatey notes of the cake, while chopped walnuts or pecans add a satisfying crunch. Imagine the delightful texture and flavor combination!
For further baking inspiration, check out Bon Appétit or Food Network for great ideas. Adding your flair to such a timeless recipe can make all the difference, turning a standard red velvet cake into your signature dessert. Happy baking!
Helpful Cooking Tips and Notes for Red Velvet Cake
The Importance of Using Room Temperature Ingredients
When it comes to baking the ultimate red velvet cake, using room temperature ingredients is crucial. Why? Ingredients like butter, eggs, and milk blend more smoothly when they’re at room temperature, leading to a light and airy batter. This can make a significant difference in your cake’s overall texture. Remember, it’s best to take these ingredients out of the fridge about 30 minutes before you start.
Tips for Achieving the Perfect Cake Texture
-
Sift Your Dry Ingredients: Sifting flour, cocoa powder, and baking powder helps to aerate them, ensuring a lighter cake.
-
Don’t Overmix: Once the wet and dry ingredients are combined, mix just until incorporated. Overmixing can develop gluten, leading to a denser cake.
-
Check for Doneness: Use the classic toothpick test—insert it into the center of the cake. If it comes out clean, your red velvet cake is ready!
By following these tips, you’ll be well on your way to baking a beautiful and delicious red velvet cake that’s sure to impress. For more in-depth baking techniques, check out resources like King Arthur Baking or The Kitchn. Happy baking!
Serving Suggestions for Red Velvet Cake
Ideal pairings for red velvet cake
When it comes to serving red velvet cake, think about flavors that complement its rich, velvety texture. Here are some delightful pairings:
- Cream cheese frosting: This classic pairing enhances the cake’s flavors and adds a beautiful tang.
- Fresh berries: Raspberries, strawberries, or blueberries provide a refreshing contrast and brighten the plate.
- Coffee or herbal tea: A warm cup brings out the cake’s richness and creates an inviting atmosphere.
Want to explore more flavor pairings? Check out this article for inspiration.
Creative presentation ideas
The way you present your red velvet cake can elevate the entire experience. Consider these creative ideas:
- Layered display: Stack several small tiers for a gorgeous, multi-dimensional look.
- Garnish wisely: Sprinkle crushed nuts or chocolate shavings around the base to create a delightful contrast against the vibrant red.
- Serve on stylish platters: Use decorative plates or wooden boards for a rustic charm.
Next time you serve up red velvet cake, try these tips to impress your guests and make your cake the star of the show!
Time Breakdown for Making Red Velvet Cake
When you’re ready to dive into the delicious world of red velvet cake, it’s important to know how to manage your time effectively. Here’s a quick guide to help you plan your cake-making adventure.
Preparation Time
Expect to spend around 30 minutes gathering your ingredients and prepping them. This includes mixing your dry components, sifting cocoa powder, and dyeing your batter that striking red color. If you’re new to baking, it might take a bit longer, so take your time!
Baking Time
The actual baking will take about 25-30 minutes. It’s always a good idea to check for doneness a few minutes before the recommended time, as oven temperatures can vary.
Total Time
In total, you should allocate around 1 hour for the entire process, from preparation to pulling your cake out of the oven. Planning a bit ahead can make the experience less stressful—because who doesn’t love a little extra time to enjoy the process?
For additional tips and variations, consider checking out resources from Epicurious or Serious Eats to enhance your baking skills and cake creativity!
Nutritional Facts for Red Velvet Cake
Calories per serving
A slice of red velvet cake typically contains around 350-400 calories. The exact amount can vary based on the recipe and portion size, but it’s important to savor each bite!
Key nutritional elements
When indulging in red velvet cake, here are some key nutritional elements to consider:
- Fat: Generally, you can expect about 15-20 grams of fat per slice, primarily from butter and cream cheese in the frosting.
- Carbohydrates: A slice will provide approximately 40-50 grams of carbohydrates, thanks to the flour and sugar.
- Sugars: Expect around 25-30 grams of sugar, which contributes to that sweet, irresistible flavor.
- Protein: With about 4-6 grams of protein, it’s not a protein powerhouse, but it adds some nutritional balance.
For more insights on calorie counting and healthier alternatives, check out resources like the USDA FoodData Central. Balancing your love for red velvet cake with nutritious choices can be part of a well-rounded diet!
FAQs About Red Velvet Cake
How do I store leftover red velvet cake?
If you find yourself with leftover red velvet cake, don’t worry! To keep it fresh, store it in an airtight container at room temperature if you plan to eat it within two days. For longer storage, wrap individual slices tightly in plastic wrap and place them in the refrigerator. Properly stored, your red velvet cake can last up to a week. You can even freeze slices for up to three months for a sweet treat later! Just remember to thaw it in the fridge overnight before indulging.
Why is red velvet cake red?
Curious about the vibrant color of red velvet cake? The classic hue comes from a reaction between the cocoa powder and acid (usually buttermilk and vinegar) in the recipe. Adding food coloring amplifies that bold color, making the cake visually spectacular. While many modern recipes rely on food coloring, you can add beets or pomegranate juice for a more natural red tint. For more on the science behind baking, check out resources from the American Chemical Society.
Can I make red velvet cake ahead of time?
Absolutely! One of the best things about red velvet cake is that it actually tastes better the next day as the flavors meld. You can bake and frost the cake a day in advance. Just store it in the fridge to keep it moist. If you’re in a pinch, you can even prepare the batter and refrigerate it overnight before baking. Preparing ahead means you’ll have more time to enjoy your celebration!
For additional tips and tricks, consider visiting popular baking blogs like Sally’s Baking Addiction or Bakerella for inspiration!
Conclusion on Red Velvet Cake
Final thoughts on why every young professional should try making red velvet cake
If you haven’t yet ventured into the world of baking, making a red velvet cake is the perfect starting point. Its striking color and rich flavors not only impress at gatherings but also make for memorable experiences in the kitchen.
Baking this classic dessert offers several benefits:
- Creativity: Express your unique style through decorations and fillings.
- Mindfulness: Engage in a hands-on activity that allows you to unwind and focus.
- Sharing Moments: Bring people together to indulge in something delicious.
Whether celebrating a birthday or simply enjoying a cozy evening, a homemade red velvet cake can elevate any occasion. Plus, it’s a delightful way to showcase your culinary skills. So why wait? Grab your ingredients and start baking today!
PrintRed Velvet Cake Bliss: An Easy Recipe for Home Bakers

Experience the delight of homemade red velvet cake with this easy recipe that even novice bakers can master.
- Prep Time: 20 minutes
- Cook Time: 30 minutes
- Total Time: 50 minutes
- Yield: 12 servings
- Category: Dessert
- Method: Baking
- Cuisine: American
- Diet: Vegetarian
Ingredients
- 2 cups all-purpose flour
- 1 ½ cups granulated sugar
- 1 cup vegetable oil
- 1 cup buttermilk
- 2 large eggs
- 2 tablespoons red food coloring
- 1 teaspoon vanilla extract
- 1 teaspoon baking soda
- 1 teaspoon white vinegar
- ½ teaspoon salt
Instructions
- Preheat your oven to 350°F (175°C) and grease two 9-inch round cake pans.
- In a large mixing bowl, combine flour, sugar, baking soda, and salt.
- In another bowl, whisk together oil, buttermilk, eggs, food coloring, and vanilla.
- Mix the wet ingredients into the dry ingredients just until combined.
- Add the vinegar and gently fold into the batter.
- Divide the batter evenly between the prepared cake pans.
- Bake for 25-30 minutes or until a toothpick comes out clean.
- Allow to cool in the pans for 10 minutes before transferring to wire racks to cool completely.
Notes
- For best results, use room temperature ingredients.
- Feel free to add cream cheese frosting for a classic finish.
Nutrition
- Serving Size: 1 slice
- Calories: 320
- Sugar: 30g
- Sodium: 200mg
- Fat: 15g
- Saturated Fat: 2g
- Unsaturated Fat: 10g
- Trans Fat: 0g
- Carbohydrates: 45g
- Fiber: 1g
- Protein: 4g
- Cholesterol: 40mg