
Introduction to Chocolate Marble Bread
Why Chocolate Marble Bread is a Must-Try
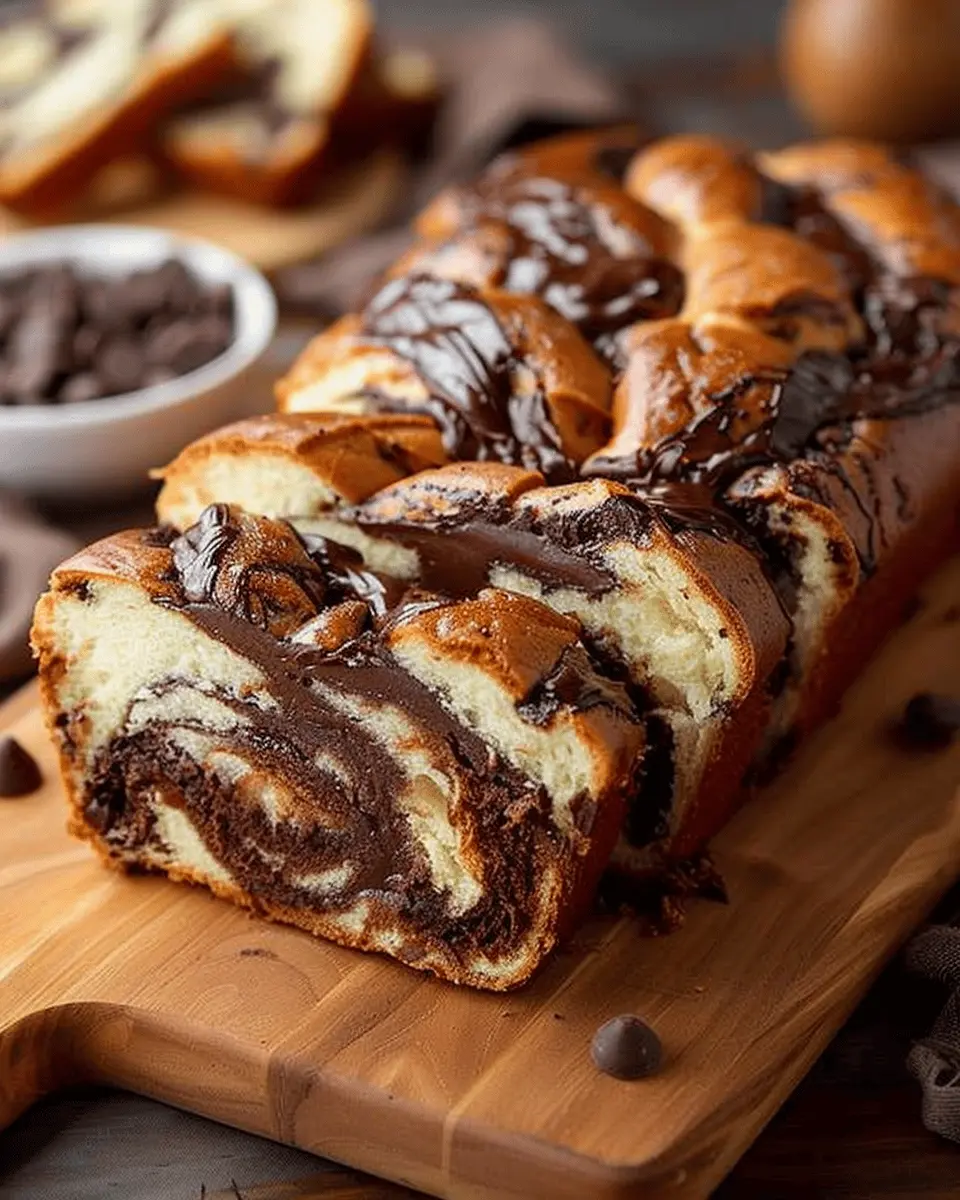
Let’s talk about chocolate marble bread. Imagine slicing into a loaf that tantalizes your senses with its rich, swirled patterns of chocolate and vanilla. This delightful creation not only looks stunning but also offers a perfect balance between sweetness and a hint of bitterness from the cocoa. Trust me, it’s a true treat for your taste buds!
What sets this bread apart is its versatility. Perfect for breakfast, an afternoon snack, or even as a dessert, chocolate marble bread can fit seamlessly into various moments of your day. Think about it: waking up to the aroma of freshly baked chocolate bread wafting through your home? That’s pure bliss! And if you’re hosting friends for brunch, serving a platter of this scrumptious bread can elevate your gathering.
As an added bonus, the ingredients required for this recipe are straightforward and often found in your pantry. Basic essentials like flour, eggs, sugar, and butter come together to create a comforting loaf that’s both satisfying and indulgent. If you’re keen on exploring the nutritional aspects of this bread, you’ll find that a slice can be a delightful source of carbs and a quick energy boost.
The technique involved in creating those mesmerizing swirls might seem daunting, but I promise it’s easier than it looks! It’s all about the layering and gentle folding, and soon enough, you’ll be a chocolate marble master in your own kitchen. Plus, if you’re feeling adventurous, feel free to play around with flavors—perhaps add a touch of cinnamon or a sprinkle of sea salt on top to elevate the taste.
Why not make this an opportunity for a fun cooking session? Gather your friends or family and take on the challenge together. You may just create some delightful memories while baking!
For more culinary inspiration or tips on baking techniques, you might want to check Cooking Light or Bon Appétit. They have an excellent collection of recipes and advice that could take your skills to the next level. So, are you ready to dive into the world of chocolate marble bread? Let’s get baking!
Ingredients for Chocolate Marble Bread
Essential Ingredients for the Perfect Loaf
Creating a delightful chocolate marble bread begins with selecting the right ingredients. Each component plays a crucial role in bringing out the rich flavors and soft texture that make this loaf irresistible. Here’s what you’ll need:
- All-purpose flour: The backbone of your bread, providing structure and a fluffy texture.
- Granulated sugar: Sweetens the dough while balancing the dark cocoa.
- Unsweetened cocoa powder: Adds that rich chocolate flavor, essential for the marbling effect.
- Baking powder: This leavening agent gives your bread that perfect rise.
- Salt: A pinch enhances all the other flavors and balances the sweetness.
- Unsalted butter: Adds moisture and a rich flavor. Feel free to substitute with healthier oils for a lighter option.
- Milk: Contributes moisture—choose whole milk for richness or a plant-based alternative for a dairy-free version.
- Eggs: These help bind the ingredients and provide a lovely structure.
For tips on how to select quality cocoa, check out this guide on choosing baking cocoa. Combining these ingredients with love and care will lead you to a beautifully marbled loaf every time!
Preparing Chocolate Marble Bread
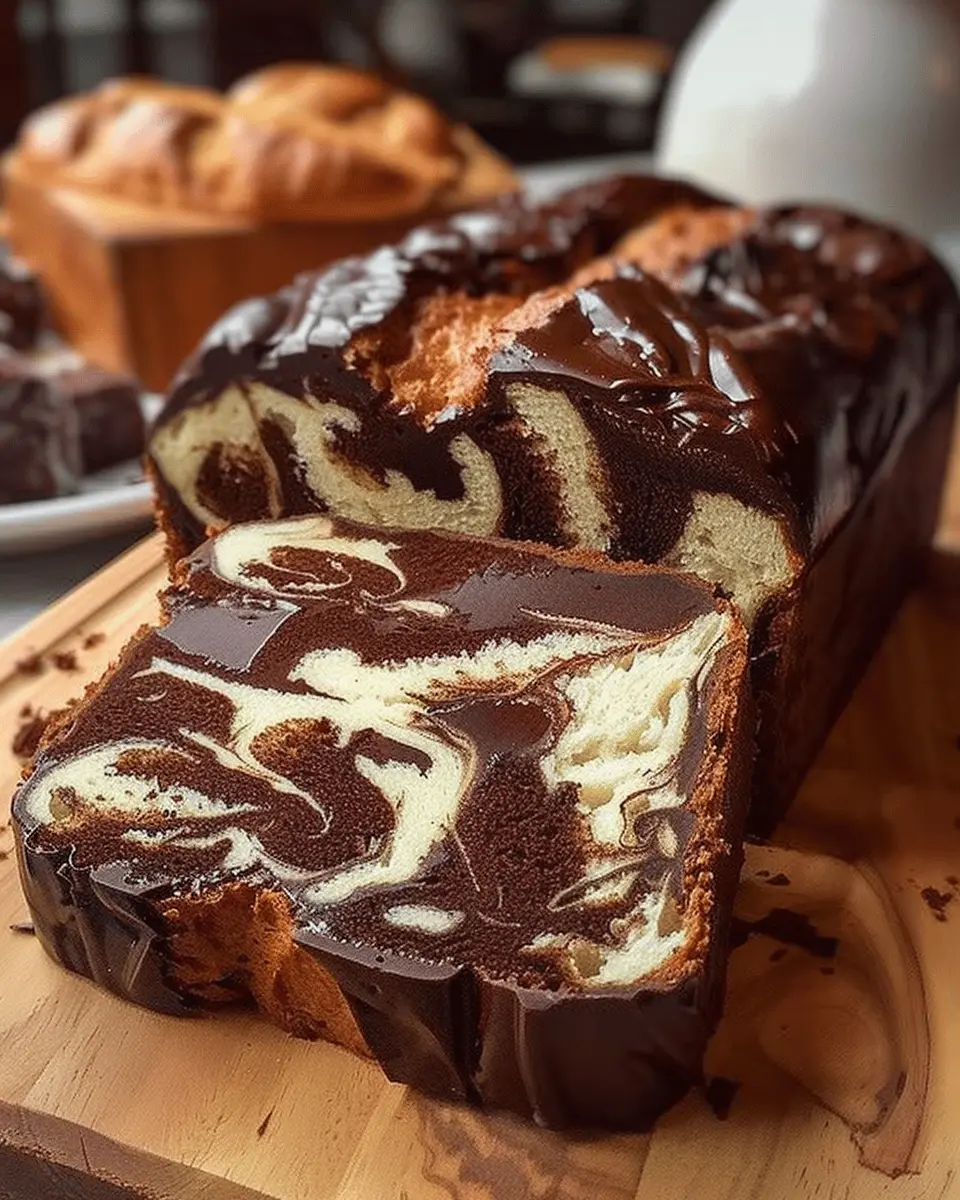
Baking chocolate marble bread is a delightful way to impress friends or simply treat yourself. This deliciously soft and moist bread combines rich chocolate with a tender vanilla batter, creating a stunning marbled effect. Below, you’ll find a simple and enjoyable guide to making this delightful bread from scratch.
Gather Your Ingredients
Before diving into the baking process, it’s essential to gather all your ingredients. This not only saves time but also ensures that you have everything you need at your fingertips. Here’s what you’ll require:
-
Dry Ingredients:
-
2 cups all-purpose flour
-
1 tsp baking powder
-
1/2 tsp baking soda
-
1/4 tsp salt
-
Wet Ingredients:
-
1/2 cup unsalted butter, softened
-
1 cup granulated sugar
-
2 large eggs
-
1 tsp vanilla extract
-
1/2 cup buttermilk (or plain yogurt)
-
Chocolate Mixture:
-
4 oz semi-sweet chocolate or dark chocolate
Having your ingredients ready can make the entire process smoother, and it’s always a good idea to use high-quality chocolate for the best flavor.
Melting the Chocolate
The first step in your chocolate preparation involves melting. You can either use a microwave or a double boiler. Here’s how you can do it:
- Microwave Method: Chop the chocolate into small pieces and place it in a microwave-safe bowl. Heat in 20-second intervals, stirring between each, until completely melted.
- Double Boiler Method: Fill a saucepan with a small amount of water and bring it to a simmer. Place a heatproof bowl over the saucepan, ensuring it doesn’t touch the water. Add the chocolate and stir until melted.
Once melted, let the chocolate cool slightly. This will prevent it from cooking the eggs when mixed.
Mixing the Dry Ingredients
In a separate bowl, you can start combining your dry ingredients. Whisk together:
- Flour
- Baking powder
- Baking soda
- Salt
This step is crucial as it incorporates air into the flour, ensuring an even rise. Remember, a well-combined flour mixture leads to a fluffy bread!
Creaming Butter and Sugar
Next, it’s time to cream together your softened butter and granulated sugar until it’s light and fluffy—about 3-5 minutes. Why is this step important? Creaming introduces air into the mixture, which helps the bread rise beautifully. Using an electric mixer makes this job much easier!
Once whipped, add in the eggs one at a time, mixing thoroughly after each addition, and then stir in the vanilla extract.
Combining Wet and Dry Ingredients
Now it’s time to combine those wet and dry ingredients! Start by adding the flour mixture to the creamed butter mixture, alternating with the buttermilk. Begin and end with the flour mixture. Mix until just combined—you don’t want to overmix, as that can result in dense bread.
Creating the Marble Effect
Now for the fun part! Carefully divide the batter into two bowls: one for the vanilla flavor and one for the chocolate. Use a spatula to gently fold the melted chocolate into one half of the batter.
Then, in a greased or lined loaf pan, start layering the two batters.
- Pour a scoop of vanilla batter, then a scoop of chocolate batter on top.
- Use a knife or skewer to swirl the two batters together, creating the beautiful marbled effect.
Baking to Perfection
Finally, place your prepared loaf pan in a preheated oven at 350°F (175°C) and bake for 50-60 minutes, or until a toothpick inserted in the center comes out clean. The kitchen will fill with the heavenly aroma of your chocolate marble bread, making the wait even harder!
Once baked, allow your creation to cool in the pan for 10 minutes before transferring it to a wire rack. Let it cool completely, slice, and enjoy!
Baking chocolate marble bread can be a joyful and rewarding experience, perfect for cozy evenings or family gatherings. If you’re ready to elevate your baking game, consider picking up some tips on baking fundamentals to ensure your bread is a hit every time!
Variations on Chocolate Marble Bread
Peanut Butter Swirl Variation
If you’re a fan of the irresistible combination of peanut butter and chocolate, then this variation of chocolate marble bread is a must-try! To make this tasty twist, simply mix in some creamy peanut butter into half of your chocolate batter. Here’s how to do it:
- Prepare your classic chocolate marble bread batter as usual.
- Before pouring the chocolate batter into your loaf pan, take about one cup of the batter and gently mix in half a cup of peanut butter.
- Swirl the peanut butter mixture with the chocolate batter for that beautiful marbled effect.
- Bake as directed, and voilà! You’ll have a luscious bread that combines the rich taste of chocolate and the nutty flavor of peanut butter.
Curious to explore more about these flavor pairings? Check out resources like the National Peanut Board for inspiration.
Vegan Chocolate Marble Bread
For those who prefer a plant-based diet, fear not! You can enjoy delicious chocolate marble bread without any animal products. Here’s how to make it vegan-friendly:
- Replace eggs with flaxseed meal mixed with water (2 tablespoons of flaxseed meal + 6 tablespoons of water = 1 egg).
- Use unsweetened applesauce or a dairy-free yogurt in place of regular yogurt, which will help maintain the moistness you love.
- Opt for a plant-based milk like almond or oat milk instead of regular milk.
This is a fantastic way to create a delightful loaf that caters to both vegans and chocolate lovers alike! If you’re looking for more vegan baking tips, the Vegan Society is a great resource to explore.
Whether you try the peanut butter swirl variation or indulge in a vegan version, your chocolate marble bread will surely impress family and friends with its delightful twists!
Cooking Tips and Notes for Chocolate Marble Bread
Key Techniques for Success
Making chocolate marble bread can be a delightful challenge, but keeping these tips in mind will help ensure your baking adventure is a success.
-
Proper Mixing: Be careful not to overmix your batter. When combining the chocolate and vanilla batters, fold gently to create those beautiful marbled swirls without blending them completely.
-
Room Temperature Ingredients: Using room temperature eggs and butter gives you a smoother batter and a more even rise. Trust me, it makes a genuine difference!
-
Swirl Like a Pro: To achieve that perfect marble effect, use a spatula or butter knife to gently swirl the two batters together. Avoid the “just one more swirl” temptation—it’s about subtlety!
-
Storage Secrets: Keep your chocolate marble bread fresh by wrapping it tightly in plastic wrap or storing it in an airtight container. It stays delicious for up to a week—if it lasts that long!
Baking can be such a rewarding experience—check out resources like King Arthur Baking for more inspiration and tips on your baking journey!
Serving Suggestions for Chocolate Marble Bread
Breakfast Delight or Afternoon Treat?
When it comes to enjoying chocolate marble bread, the possibilities are endless! This delightful loaf is not just a simple breakfast option; it can also elevate your afternoon tea to new heights.
Breakfast Ideas:
- Toasted with a Twist: Slice your chocolate marble bread and toast it lightly. Add a smear of peanut butter or almond butter for a protein-packed start to your day.
- Turkey Bacon Pairing: Serve it alongside crispy turkey bacon for a hearty and indulgent breakfast. The savory notes of the bacon contrast beautifully with the sweet chocolate.
Afternoon Treats:
- Tea Time Companion: Enjoy a slice with a cup of your favorite herbal tea. Chamomile or peppermint can enhance the chocolate flavor and provide a soothing experience.
- Dessert Upgrade: Top a piece with a scoop of vanilla ice cream or a dollop of whipped cream for a decadent dessert after dinner.
For more ideas on pairings, check out BBC Good Food for expert tips. Embrace the versatility of chocolate marble bread, and make each slice a new experience!
Time Breakdown for Chocolate Marble Bread
When planning to bake your chocolate marble bread, it’s essential to keep track of your time for a smooth and enjoyable experience. Here’s a quick breakdown to help you manage your baking schedule.
Preparation Time
Expect to spend about 15-20 minutes prepping ingredients for your chocolate marble bread. This includes measuring flour, cocoa, and sugar, melting chocolate, and mixing the batter. A little preparation goes a long way, and this step is crucial for a successful outcome.
Baking Time
The baking process will take around 45-55 minutes. Make sure to check for doneness by inserting a toothpick into the center. It should come out clean or with a few moist crumbs attached when your bread is ready.
Cooling Time
Let your chocolate marble bread cool in the pan for about 10-15 minutes before transferring it to a wire rack. This step is important as it helps the bread maintain its shape and ensures a moist loaf.
For a deeper dive into baking concepts, check out this baking tips guide that offers insights from experienced bakers. Happy baking!
Nutritional Facts for Chocolate Marble Bread
Calories per Slice
A slice of chocolate marble bread typically contains around 200-250 calories, depending on the recipe and portion size. This makes it a delightful treat that you can enjoy without straying too far from your nutritional goals—perfect for breakfast or an afternoon snack.
Key Nutrients
In addition to its delicious flavor, this delectable bread offers some key nutrients:
- Carbohydrates: Provides energy to keep your day moving.
- Protein: Contributes to muscle repair and growth, especially if you enjoy it with a protein-rich spread like nut butter.
- Fats: Sources of healthy fats, particularly if you opt for recipes that include nuts or seeds.
When baking, consider incorporating whole-grain flours for added fiber. Fiber supports digestive health and can help you feel fuller longer. For more details on how fiber benefits your health, check out resources from the American Heart Association.
Incorporating chocolate marble bread into a balanced diet can satisfy your sweet tooth while also offering nutritional value—it’s all about moderation and smart pairings!
FAQ about Chocolate Marble Bread
Can I use cocoa powder instead of chocolate?
Absolutely! If you’re in a pinch or looking for a less sweet option, using cocoa powder instead of chocolate works well in chocolate marble bread. Just remember to use a little less than you would of melted chocolate, as cocoa powder is more concentrated. For every 1 ounce of chocolate, use about 3 tablespoons of cocoa powder combined with 1 tablespoon of fat, like butter or oil, to maintain moisture.
How do I store leftover chocolate marble bread?
Storing your leftover chocolate marble bread is simple! Keep it covered at room temperature for up to 3 days. If you want it to last longer, wrap individual slices tightly in plastic wrap and place them in a freezer bag. This way, it can last for up to 3 months in the freezer. Just remember to thaw it in the refrigerator or at room temperature before enjoying it again. For tips on storing baked goods, check out King Arthur Baking.
What can I serve with chocolate marble bread?
Pairing chocolate marble bread with the right accompaniments can elevate your experience. Here are some delicious suggestions:
- Fresh fruits: Strawberries or raspberries add a touch of acidity that complements the sweetness.
- Nut spreads: Try almond or peanut butter for a protein boost and flavor contrast.
- Cream cheese: A dollop offers a delightful creaminess that balances the richness of the bread.
- Herbal teas or coffee: A warm beverage enhances the overall enjoyment, making it an excellent choice for breakfast or an afternoon snack.
With these tips in mind, you’ll be prepared to savor every loaf you bake!
Conclusion on Chocolate Marble Bread
Wrap-Up and Call to Action
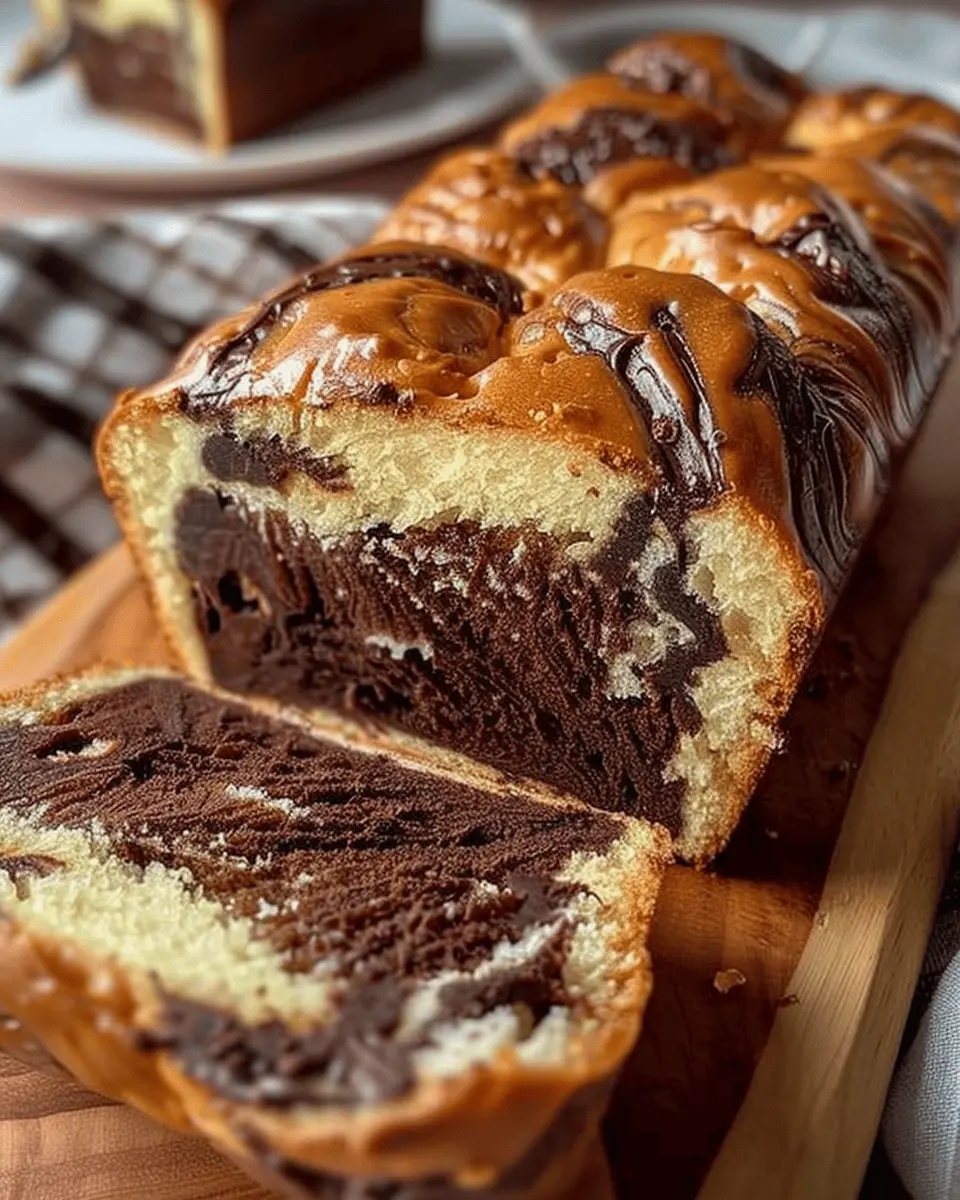
As we wrap up our delicious journey into the world of chocolate marble bread, it’s clear that this recipe is both a feast for the eyes and a treat for the palate. The swirls of rich chocolate against the soft, buttery bread create a texture and flavor experience that’s simply irresistible. Whether it’s for a cozy brunch or a sweet dessert, this bread is sure to impress your friends and family.
Now it’s time to roll up your sleeves and bring this tasty creation to life! Don’t forget to share your own variations or baking tips with us in the comments below. If you loved this recipe, check out more inspiration on baking blogs like Sally’s Baking Addiction or Bakerita. Happy baking!
PrintChocolate Marble Bread: The Best Indulgent Treat for Home Chefs
Indulge in the rich, flavorful layers of this Chocolate Marble Bread, perfect for any home chef looking to impress.
- Prep Time: 20 minutes
- Cook Time: 60 minutes
- Total Time: 1 hour 20 minutes
- Yield: 1 loaf
- Category: Desserts
- Method: Baking
- Cuisine: American
- Diet: Vegetarian
Ingredients
- 2 cups all-purpose flour
- 1 cup granulated sugar
- 1/2 cup unsweetened cocoa powder
- 1 teaspoon baking powder
- 1/2 teaspoon baking soda
- 1/2 teaspoon salt
- 1/2 cup unsalted butter, softened
- 3 large eggs
- 1 teaspoon vanilla extract
- 1 cup buttermilk
Instructions
- Preheat the oven to 350°F (175°C).
- In a bowl, mix flour, sugar, cocoa powder, baking powder, baking soda, and salt.
- In another bowl, cream butter and sugar until fluffy.
- Add eggs one at a time, mixing well after each addition, then stir in the vanilla.
- Alternate adding the dry ingredients and buttermilk to the butter mixture until just combined.
- Pour half the batter into a loaf pan, then swirl in the remaining batter on top.
- Bake for 50-60 minutes until a toothpick comes out clean.
- Let cool before slicing and serving.
Notes
- For a richer chocolate flavor, add chocolate chips to the batter.
- You can substitute buttermilk with yogurt for a similar result.
Nutrition
- Serving Size: 1 slice
- Calories: 250
- Sugar: 15g
- Sodium: 200mg
- Fat: 10g
- Saturated Fat: 6g
- Unsaturated Fat: 3g
- Trans Fat: 0g
- Carbohydrates: 34g
- Fiber: 2g
- Protein: 4g
- Cholesterol: 70mg